Were you a fan of CHF?? Are you still mourning the retirement of some of their images?? I still have people offer to buy some of my backgrounders and sets. Well, then you may be glad to hear that Stamper's Ink has purchased the CHF line. They have not rolled out all the deets yet, but you can poke around their site to read a bit about them and their plans. I am glad to know these fabulous images are being given new life! That is the good news.
The bad news is that they have taken down the old site, gallery and even the blog. Maybe they will bring some of it back. I am really bummed about all the great tutorials that were available, the blog and website were a great resource!
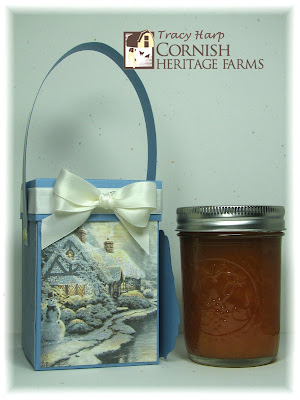
Yesterday I got an email from Heidi looking for one of the tutorials I posted on the CHF blog. Well, I had the photos but none of the text. What was I thinking???! Here is a recap of my:
Jam Box
You will need a few supplies...
12x12 card stock for box
5 1/8" square piece of card stock for lid
1x12 strip of card stock for the handle
scoring tool
sticky tape
brads

Score the 12x12 card stock at 4 1/2" and 7 1/2" in each direction.
Cut along lines on opposite sides, up to first score line, as shown in photo below
 Cut away 2 1/2" of the outer corners as shown below, leaving 2" sides. Trim corners so they don't bind when assembling the box.
Add sticky strip to the sides as shown and assemble the box

Score the 5 1/8" piece for the lid at 1" on all sides

Cut tabs like shown below, add adhesive and assemble lid.

Cover the panels of the box with patterned paper.
The handle is a strip of 1"x12" long, attached to the box with brads.
Here is another box I made, it is simply covered with some designer paper and accented with ribbon and a tag.

I also posted these, used to package ornaments rather than jam. Really, the boxes can work for many different things. You could even use a die cut to create a window in the front of the box but I would only do that if the contents aren't super heavy or it might compromise the strength of the box.

Here is a modified version I posted back in June. The box is made from a 9" square piece, scored at 3" and 6" in both directions.

Oh the days when I had time to tinker! I haven't even canned a single jar of anything this year. Revisiting this post has inspired me though. There is still time for salsa and peaches!
Enjoy!!


3 comments:
Yay!! You are the bomb, Tracy! I love these boxes and never thought to download the tutorial or considered it might not be there one day. Now, I am definitely going to save this to my own files, just in case;) Thank you, thank you, thank you!
I’m happy to have found your very excellent article! I agree with some of your readers and will eagerly look forward to your coming updates. Just
I know that problem well! I really need to go through and re-organize my tags and categories on a few blogs I operate. I am going to try and limit my categories to about 10 areas, using tags to help further group my articles.
Post a Comment