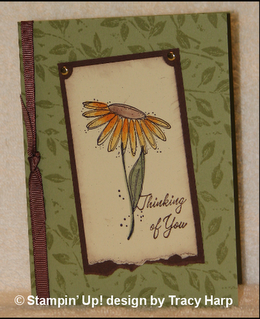
I love to use wheels in my stamping. I use them to create backgrounds, fancy up gift bags, make wrapping paper and in the case of some jumbo wheels, as a focal image. I have demoed wheels for 2 years now and people usually love what they can do but don't necessarily feel skilled in using them. It seems like a simple thing (it's easy when you know how) and I am going to share some of my tips so you too will think that wheels are a simple thing.
Tip #1: choose your wheels wisely! I try to choose wheels that are forgiving. By that I mean, if I am creating a background effect and I don't wheel perfectly straight or my rows aren't spaced just so, it doesn't scream "crappy job!" I tend to stay away from wheels that have straight images or heaven forbid...lines. ACK!! If I wheel an entire sheet of cardstock I want it to look like patterned paper, KWIM? Here is a short list of wheels you would find in my stash: Garden Annuals, Watercolor Joy, Twinkle, Snowflake, Hot to Dot, Leaf Prints, Bloomin, Swirl Fun, Wings and Things, Rough Texture, Watercolor Vine, Swirling Stars, Bouquet. Now I do own some not so forgiving wheels but they are not used as frequently and if you are just wading into the wheely waters then go with my previous suggestions. Success is a great motivator to keep going and I think you can be successful with those.
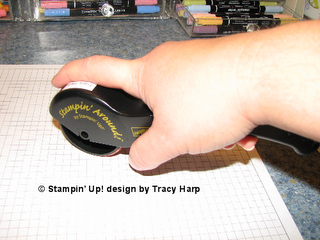
 Tip#2: hold your handle wrong! You read that right, hold the handle wrong, actually don't hold the handle at all. If you do, it wiggles and wobbles and leaves an unevenly inked mess. See the photo. I hold it near the neck with my index finger over the barrel. This gives you much more control. I am a puller not a pusher when it comes to rolling b/c I feel it gives me more control but in the end it is a preference, no right or wrong.
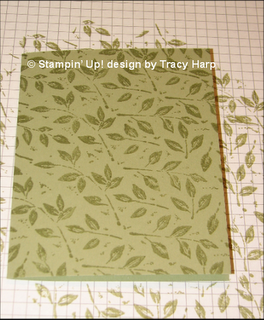
Tip #3: wheel at a diagonal, not vertical or horizontal. Now this only counts when creating a background effect where you are repeatedly wheeling a pattern. I find if you wheel on the diagonal the "lines" between each pass aren't as obvious thus creating an overall patterned look. If you are using a wheel like the Loads of Love ones they will need to be wheeled horizontally and a wheel guide can be your friend to get it wheeled straight. I own the wheel guide but honestly rarely use it because of the types of wheels I use.
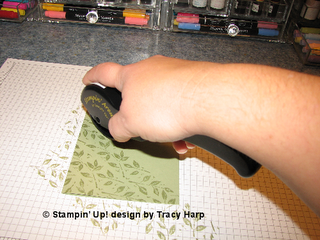
Tip #4: when wheeling a whole piece of cardstock (of any size) wheel in such a way that you can see your inked images. This is a common mistake I see people make. They begin at the top of the cardstock and work their way down but this causes your hand to block your view thus making it difficult to line up your pattern. I am right handed so I begin in the lower left corner of my cardstock. If you are a leftie then start in the lower right corner. Always start off your cardstock and wheel off the other end so that you get complete coverage.
Now a word about ink. You can buy just about every SU ink color in a wheel cartridge (the jumbo cartridges come in fewer color choices) and you can always purchase an uninked cartridge and ink it in any color you wish. You can also use your ink pads to ink up your wheels. There are pros and cons to both methods. If you are wheeling a card front you can easily use your ink pads, re inking your wheel with every pass. This gives you as many options as you have ink pads and can be a quick and easy method. I have found that occasionally I get edge marks from my wheel and this happens more often when inking the wheel on the ink pad vs. using a cartridge. The cartridges are great for larger projects like scrapbook pages, gift  wrap, multiple cards and can save time. I recommend that you purchase a bottle of re inker at the same time you purchase a cartridge as you will need to refresh the cartridge from time to time. The one down side to the cartridges is that the lids do not snap tight so the ink can dry out quickly in between uses. To help that you can store your cartridges in a zip lock bag. Bottles of ink are only 2.50 and can be used for so many things so they are a great thing at a great price!
 wrap, multiple cards and can save time. I recommend that you purchase a bottle of re inker at the same time you purchase a cartridge as you will need to refresh the cartridge from time to time. The one down side to the cartridges is that the lids do not snap tight so the ink can dry out quickly in between uses. To help that you can store your cartridges in a zip lock bag. Bottles of ink are only 2.50 and can be used for so many things so they are a great thing at a great price!
If you are new to wheels I hope you will give them a try. If you have tried and been unsuccessful I hope these tips will encourage you to try again. There are so many wonderful designs and they can change the look of a project with a just few passes.
Thanks for stopping by!


5 comments:
Thank you so much for this! I have been hesitant to do wheels, because experience with others' wheels has been the problems you mention.
I, also, am attracted to the types of images wheels that you are.
WHeeeeeeeeeeeeeeeeeeeee(l).
I love this tutorial, thanks so much for posting it. I have not had problems with my wheel, but see some different ways to change things now, after reading this tutorial! You need a button to subscribe to your blog. Don't know if they do that on this type blog, but I love that, as it tells me each time you post something new, reminds me to come back and visit you.
Excellent tutorial! I love my wheels and I am always disappointed when someone says they are "wheel impaired" and don't use their wheels! What a wonderful resource to inspire others to give it a wheel.
Thanks, Tracy, for your great blog! Love this post - I love wheels, but always appreciate tips to use them more successfully! Your cards are fabulous and I love your style! Jessica "jessjean"
That must be why I hate those d**n things so much I've been doing it right, err wrong. The whole time. I will be trying this tonight when I get time to play.
Thanks for the turorial.
Post a Comment