
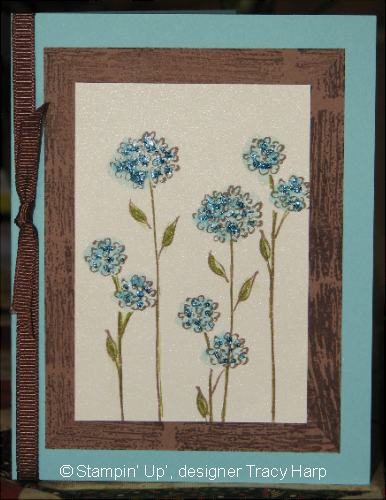
In the case of my card today I wanted a look of a frame and want the corners to look mitered. I have in the past cut an actual frame but today I took the easy way out and put my image over top of the "frame" I am making.
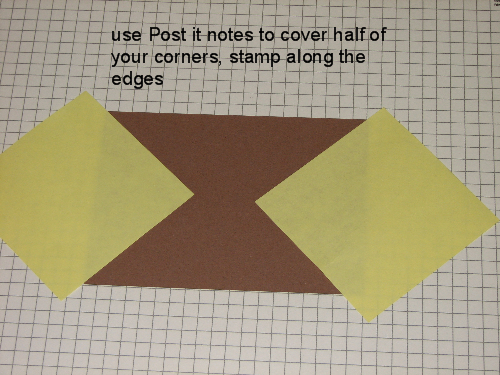
Place a post it note over half of your corner, I generally work one side at a time. Stamp along the edge, going over the post it notes. I used the Dry Brush jumbo wheel on my sample but certain backgrounds or stamps can work as well.
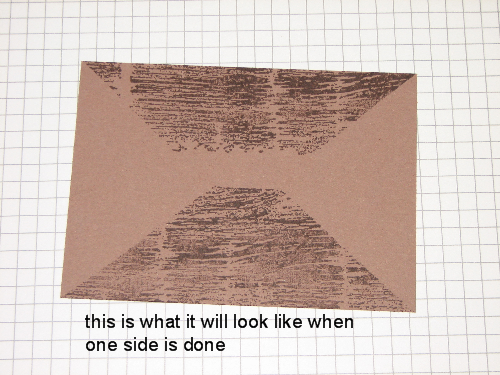
When you remove the Post it notes this is what it should look like

Now place the Post it notes to over the other side of your corner, covering the stamping you just did.
Stamp along the edges. I rolled my wheel perpendicular to my first sides. Depending on which stamp or wheel you chose this may not matter.
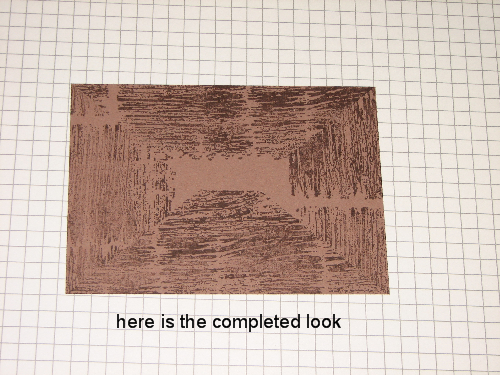
Here you can see the finshed look. The lines in the corners are faint but look like pieces of wood that have been joined at the corners.
Here is my completed card. I used the Both Way Blossoms host set. My ink colors are old olive, cool caribbean and taken with teal. I added some teal Stickles over the flowers for some sparkle.
3 comments:
Thank you for sharing this. I can't wait to try it. Pam
Wow, what an awesome technique! I can't wait to try it! Thanks for posting all the pictures! They're great!
Your blog is wonderful too. It's in my favorites and one that I check almost daily!
Rubber Hugs,
Renee
awesome I will be using this technique. Thank you
Post a Comment